Watch the video below to see how to close the racket face and brush the ball with topspin- guaranteed!
In this video, I've used a small chair as a teaching aid to guarantee a closed racket face and to "tap the dog" at the bottom of the loop on a forehand. Once Matthew starts to lift, I have a suspended ball for him to generate topspin. Since the ball is attached to the pole, he gets immediate and specific feedback on how much spin he is putting on the ball. With constant repetitions of this activity, the modern forehand is in place- guaranteed!
February 4, 2017
"My 5 Fantastic Tennis Phrases!"
These are my “go to” phrases as a tennis teacher. Phrases I've called out frequently to my students- those important reinforcing words that trigger the successful execution of a tennis stroke, or strategy. I’ve enjoyed reflecting on my 34 year career, and determining my favorite phrases. It was also interesting for me to determine the criteria for my choices. I’ve included what I’ve used most often. I’ve also included what, upon reflection, has been most helpful. There are phrases that I have not included. Phrases that I USED to use frequently, but have found something more effective. As I put my list together, I also recognized that I had phrases that were used more often for lower level players, and others for more advanced players. Since most of my teaching has been more grassroots through the years, I limited my phrases to that level.
Phrase #1: “Tip Down”
This phrase refers to the backswing of the forehand and backhand. I swear by this phrase, but have never heard it used by anyone else. I certainly did not use it when I first began teaching. I believe “tip down” reinforces several very important fundamentals. First, it keeps the backswing short. Big backswings, in my opinion, are a part of many stroke production problems. It is going to encourage a lifting racket path. I have found lifting to be a critical fundamental in teaching the forehand and backhand. It helps control the swing speed. It creates a building block for adding topspin at some point, as well as a loop backswing. (Tip down representing the bottom of your loop.)
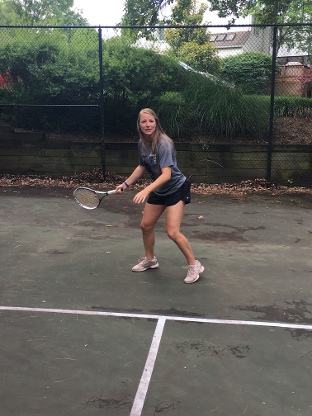
Phrase #2: “Show me your back”
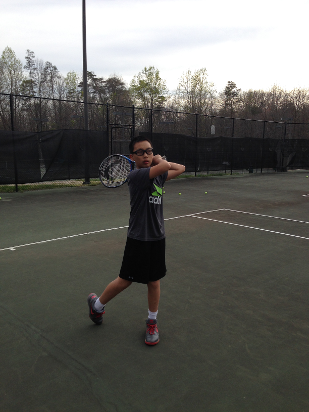
This has been my “get sideways” phrase for the last 20 years. “Get sideways” never got the results I was looking for. My students just never seemed to get sideways enough. If you “show me your back”, you are sideways! Once students get familiar with this cue, I often shorten it to just “show me”. Specifically, what I really want to see is your shoulder blade. For a right handed player, this would be your left shoulder blade for a forehand, serve, and overhead. And your right shoulder blade for a backhand. The concept of coiling your body, and uncoiling as you hit is a critical concept in stroke production. “Show me your back” has been integral in teaching this concept to my students.
Phrase #3: “Let it Drop”
With this phrase, I move on from stroke production to forehand and backhand ball judgement. I have always been intrigued by how my students would try to judge the ball in the early stages of learning. If my students had little “ball-tracking” experience, generally they would run directly to the ball. They had no understanding of the concept of moving “in relationship to the ball.” Usually running directly to the ball would lead to contact significantly above their “strike zone” which is approximately waist level. Consequently, getting my students to wait on the ball, and “let it drop” to waist level for my beginning students was an important phrase to impart. On a side-note, practicing hitting balls on the second bounce, I’ve found, to be an effective activity to promote the skill of “letting it drop.”
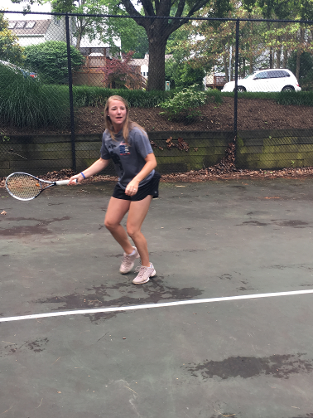
Phrase #4: “Step- step -step hold”
This continues with the ball judgement theme, but also adds the concept of balance. I teach that the skill of reacting with your feet, regardless of where the ball is hit, is essential , in learning proper footwork, ball judgement, and consequently, balance. “Step-step-step” is my reminder to react with your feet. It specifically refers to footwork as you get close to the ball, and small steps are required. The multiple little steps allow you to judge the ball properly and help time the hit by not planting your feet to early. The “hold” cue refers to being still and balanced on contact. “Hold” replaces the cue “step”, which I probably (along with many of you) started out using when I first started teaching. In regard to forehands and backhands, I currently never reinforce the concept of stepping into the shot. I’m not saying it is wrong, I just believe that stressing being relatively still and balanced and twisting (uncoiling) your body is more important!
Phrase #5: “Follow the Ball”
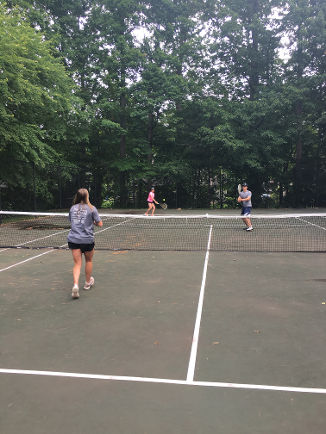
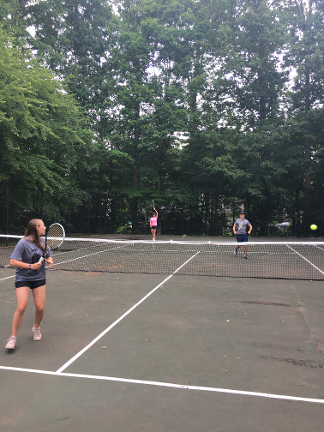
I finish my fantastic five with a doubles strategy phrase. After my students are introduced to the four starting positions on the doubles court, my next step is to teach the net players how to “follow the ball”. This is a phrase that I can honestly say has been one of my “go to’s” throughout my career. Yes, it is part of teaching doubles to beginners. However, I have been a high school coach for many years, and I am amazed how few high school players understand the concept of “following the ball”. Following the ball refers specifically to the serving partner and receivers partner in a one-up, one-back position, the prevailing position in most doubles play these days. When the ball is on the receivers side of the net, the servers partner should move up and either to the left or right, depending on the position of the ball. This places the player in the best position to cover the angles of returns. If the player remembers to “follow the direction of the ball”, this will also take them to this position. On this same play, when the servers partner moves up, the receiving partner will follow the ball by moving back and either to the left or to the right depending on the path of the ball. Both net players will continue to “follow the ball” whenever it is hit adjusting both up-and-back, and left-to-right, always stopping movements whenever the ball is about to be hit. I have spent many hours on the court leading doubles teams through one-up, one-back rallies calling out “follow the ball”, “follow the ball”.
And those are my fantastic five phrases based on 34 years of teaching. My initial brainstorming list was ten. Those that made the list but not the final five included, “highest point”(volley), “turn on it”, “high net clearance, back it up” (ball judgement), “arms-up, step, step, step” (overhead), and “tap the dog.” (bottom of your loop on forehands and backhands.)
April 17, 2016
Essential Tips for the "Modern" Forehand and Backhand, pt. 2
A few years ago, I attended a tennis teaching convention. One of the featured speakers was Dave Kozlowski. Dave went on to tennis media and created many tennis shows that were shown on Tennis Channel when it first came on the air. He told a story of how he was hitting with a young kid one day. The kid would start the rally by holding a ball on his racket, flipping the ball up in the air off his racket, and then striking the ball with the opposite side of the racket face! What he fell into was an incredibly ingenious way to teach the loop swing for the modern forehand and backhand! I use this progression all the time now with my students. I simply call it the flip drills. I like to believe that there are many people out there hitting loop topspin forehands and backhands that were first introduced to the concept with my "flip drill".
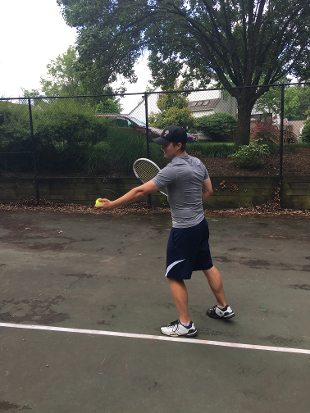
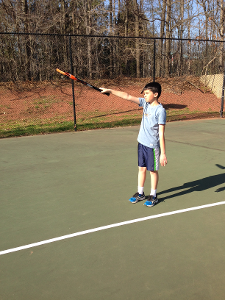
It is hard to visualize so I tried to include some still photos of the flip drill and the loop swing of the modern forehand and backhand:
1. Step one: The flip. You can't see the ball in this picture, but Nathaniel has flipped the ball up in the air with his racket face. This is a picture of the "top of his loop". Be aware that the side of the racket face in which he will strike the ball is currently POINTING DOWNWARD. This is called a CLOSED RACKET FACE.
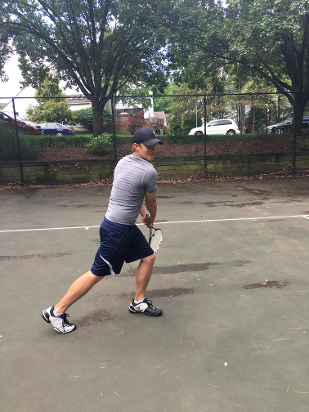
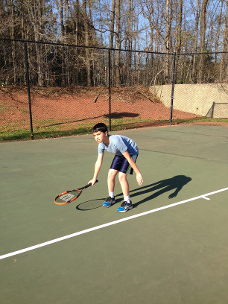
2. Step two: The tap. In this picture, Nathaniel is demonstrating the "bottom of the loop". I use the cue words "tap the dog". This means to visualize lowering the racket face and pretending to tap a small dog along side of you before you strike the ball. Note that the side of the racket that will strike the ball is STILL pointing to the ground. The loop has allowed him to create a faster swing speed and an ideal rhythm of the shot. The closed racket face will allow a greater portion of the racket face to brush the ball creating additional topspin.
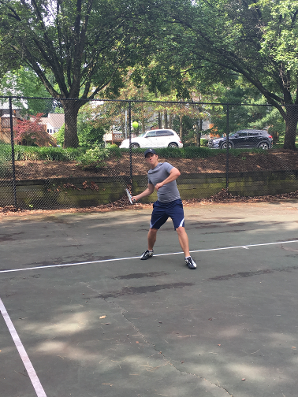
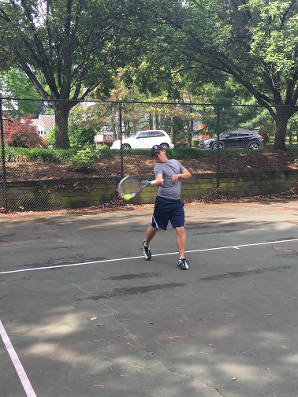
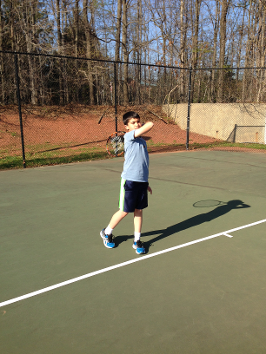
3. Step 3: A fast brush and lift. Once Nathaniel has "tapped the dog", his racket face should be several feet below the level of the ball. He will finish the shot by brushing up the back of the ball in a severe lifting motion. If his racket face is sufficiently closed on the backswing, and vertical through the hitting zone (read the tip below), the faster he swings while he lifts, the MORE topspin he will produce increasing the chance the ball will drop down quickly over the net and into the court. This picture shows the natural wrap around follow through discussed in the previous tip. (see tip below). On a side note, I rarely teach the follow-through in the introduction of this shot. I believe if these other elements are in place, the follow-through frequently takes care of itself, and should be natural. There is some tweaking that can take place if there are problems, but I've found most of the problems are due to something earlier in the shot production, not the follow-through.
April 3, 2016
Essential Tips for the "Modern" Forehand and Backhand, pt. 1
I have been teaching tennis for over 35 years. Yes, I have seen many changes in the game. However, I hesitate to say the game is now played SIGNIFICANTLY different. It still remains primarily a game of CONSISTENCY- who can get one more ball back in the court for each and every point. However, one important change is the emphasis on SWING SPEED. The newer, stronger, lighter rackets have allowed for a faster swing speed. To succeed in the "modern game", you must be able to create an efficient faster swing speed. The key is to swing faster AND MAINTAIN A HIGH LEVEL OF CONSISTENCY. The glue that holds these two concepts together is TOPSPIN. This tip focuses on how and where to place the racket (and more specifically, the racket face) prior to and during contact to create topspin. It also builds on my previous tip of racket awareness. The pictures below depict a successful teaching progression, in which I've been using lately to develop the modern groundstroke which creates TOPSPIN, and keeps the racket face aligned to your target for CONSISTENCY.
Step 1: "Tap it flush". In order to produce topspin, you must drop the racket head below ball level. I have been placing a small orange cone slightly behind the player. Prior to the hit, they are asked to "tap the cone". This guarantees that the racket head has dropped low. I also add "tap it flush". That means placing the racket face "flush" up against the top of the cone. This creates a "closed" racket face in the backswing. The closed face allows for greater brush of the ball during the hit creating more topspin.
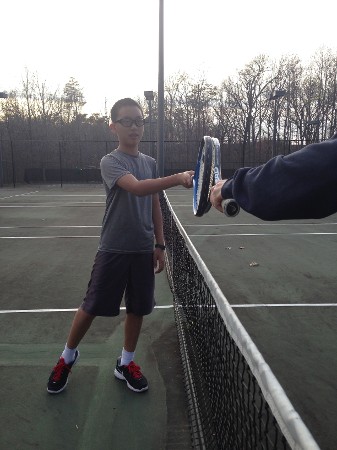
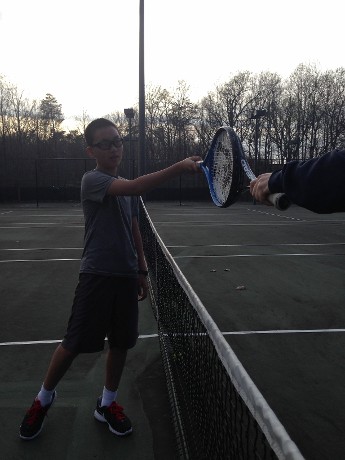
Step 2: "Flush it at Impact". We continue with the same swing. As my student continues from his closed backswing, he continues his racket path forward and upward. I have placed my racket across the net from his. I asked him to continue forward until his racket face was "flush" up against mine. Flush is critical in that it forces the player to place his racket face exactly forward and vertical at the moment of impact. Just a few degrees off of flush could mean the ball going signficantly to the left, right, or upward of their desired target. When you take a look at the next picture, you'll see that I've taken this concept even further.
Step 3: "Flush it Forward and Upward". Just recently, I've begun to take this step a little further. Upon impact, I've pulled my racket both backward and upward. I am asking my student to continue to keep his racket face flush against mine. As I pull my racket back, it requires him to continue to drive his racket face forward and upward through the hitting zone. This will result in topspin being applied, and producing a consistent shot with his racket face lined up with his target anywhere along the typical 6-18" hitting zone. Of course, he would not and should not finish with his racket face pointing to his target. This is biomechanically unnatural. By the time he reaches the spot in the picture, he will have travelled beyond his hitting zone, and can continue a natural finish with his racket and racket arm coming up and across his body.
Step 4: Wrap around follow-through finish. This shot will finish with a natural follow-through high and across your body. However, ONLY after the racket face has extended approximately 6-18" out to the target while in the hitting zone.
My next tip - part 2 of the modern forehand and backhand will be centered around the path your racket takes on the backswing in order to generate increased swing speed.
March 21, 2016
Target-line Racket Awareness
I’ve been using the term “target-line” frequently when giving my lessons recently. Let me explain what the term means, and it’s significance.
Target-line refers to having your racket face pointing to your target while your racket is traveling through the “hitting zone”. First, you should ALWAYS have a target when striking a ball. The feedback of knowing where your ball actually went in relationship to your TARGET is critical to improving your game. It is true whether we are talking about improving your performance during a match, or improving your game generally, over the long-term. Your “hitting zone” is the 6-18 inch area where you are most likely to make contact with the ball.
Below are some pictures to reinforce my belief that it is critical that you accurately align your racket face to your target. Also, it is very important the racket face stay aligned to your target at least 6-18 inches through the hitting zone. My last picture will show an activity that I frequently use to reinforce successfully aligning your racket face to your target while it is moving through the hitting zone.
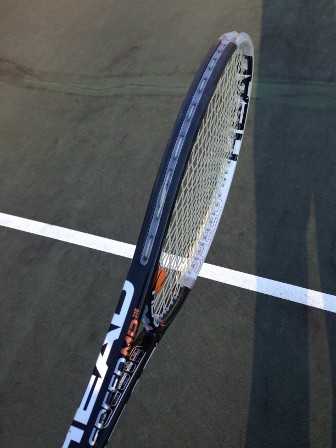
This picture is a good example of the racket face being aligned with it's target through the hitting zone. (Assuming the target is straight ahead.)
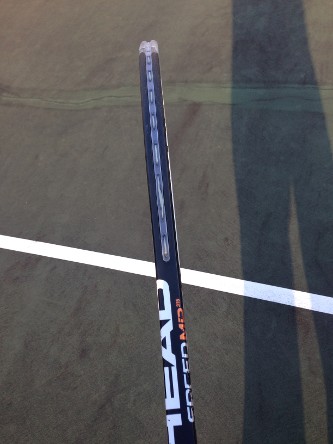
This is an example of a racket face not being aligned with it's target through the hitting zone. (Again, assuming the target is straight ahead.) Just a few degree's difference, such as depicted in the picture, will change the direction of the ball significantly.
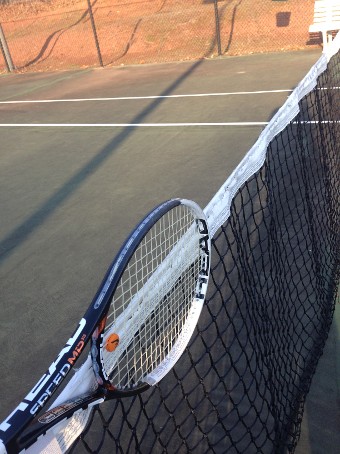
Here is an activity to practice aligning your racket face to your target, as well as placing your racket face vertical at impact. Place your racket face "flush" against the tape that runs across the top of the tennis net. Once your racket face is flush, facing forward, push the racket face forward to feel what it is like to have your racket face aligned to your target through the hitting zone.
CIT Weekly Tennis Tip by Doug Kegerreis, CIT
President
This week's tip will focus on Thomas
Nolan's great run to the VHSL state high school singles
championship. Thomas Nolan, #1 player from Chantilly High
School, overcame first-set deficits in each of his three wins at
the state tournament. I was privledged to have the
opportunity to coach him during his run to the title, and was
allowed to coach him during the changeovers throughout the
tournament.
Thomas's game
plan: Thomas is truly an all-court player.
That means he is comfortable rallying from the baseline and also
comfortable taking weak balls when given the opportunity and
transitioning to the net to finish the point. His basic
strategy is to hit aggressive, but high-percentage balls from the
baseline leaving margin for error both over the net and inside the
lines to allow for consistency. While doing this, Thomas is
looking for openings to hit a winner or a near winner when the
opportunity presents itself. Thomas has a tendency to be
impatient with his "rally ball". That is, sometimes he
tries to force the action early in the rally before really
agressive opportunities present themselves.
Thomas's injury changes the
game plan: Thomas's lower back tightened up early in the
first set of his first match. He called for a trainer, had
his back stretched out, and took some anti-inflammatory
medication. We hoped his back would respond, or else
his run for the title would come to an early end. This
situation completely changed his game plan. He could not
afford to be put on the run as his movement was severely
limited. Therefore, we decided that he would
need to stand on or inside the baseline taking balls early.
This would allow him to dictate the points, and cut off wider
angles in which his opponent could get him moving. He would
also need to take a few more chances in the rallies, going for more
aggressive shots earlier in the rally to insure that his opponent,
and not him, would be on the run. This is exactly what I
usually try to convince Thomas NOT TO DO, however, given these
circumstances, there was no other choice. Fortunately, Thomas
was able to execute the game plan and win the second set. By
the third set, his back was feeling better, he was moving better,
and he could be more patient with his rallies. By this
time, his opponent had become frustrated and started making
many more errors. This allowed Thomas to cruise to a three
set victory in the quarterfinals.
Mental toughness become a
challenge: Thomas felt a lot better about his
chances as he went on the court for his semi-final match. He
dodged a bullet, and his back was feeling better. However, he
was up against a strong opponent who was playing well. Late
in the first set, and early in the second set, Thomas was getting
frustrated and it showed. He was making a lot of discouraging
comments about his play, and his confidence level was starting
to drop. During the changeovers, I instructed Thomas to
take care of the things he could control: competing
well. In a match you can't control how well
your opponent is going to play, and you can't always control how
well you are going to play, but you can control how well
you compete. That means that you can continue to stay
positive and confident and believe that your shots are going to
start going in. It means staying calm, especially between
points, by not rushing and taking deep
breaths. Thomas did just that. In both
his semi-final and championship matches he overcame adversity, and
inconsistent play, and regained his confidence in the middle of
both of his matches to clinch a championship in which he will
cherish the rest of his life.